728x90
반응형
오가는길에 유튜브를 보다가 git api를 활용하여 issue를 생성하는 영상을 봤다.
나도 해보고 싶어서 따라하기로 했다.
1. git personal access token 받기
(1) 깃을 들어간다
(2) your profile에 들어간다

(3) 프로필 사진을 누른다.
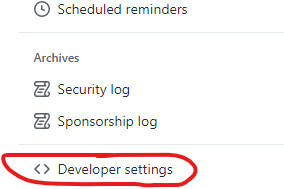
(4) 메뉴를 쭉 내리다 Developer settings에 들어간다

(5) personal access tokens 클릭 후 tokens를 클릭한다

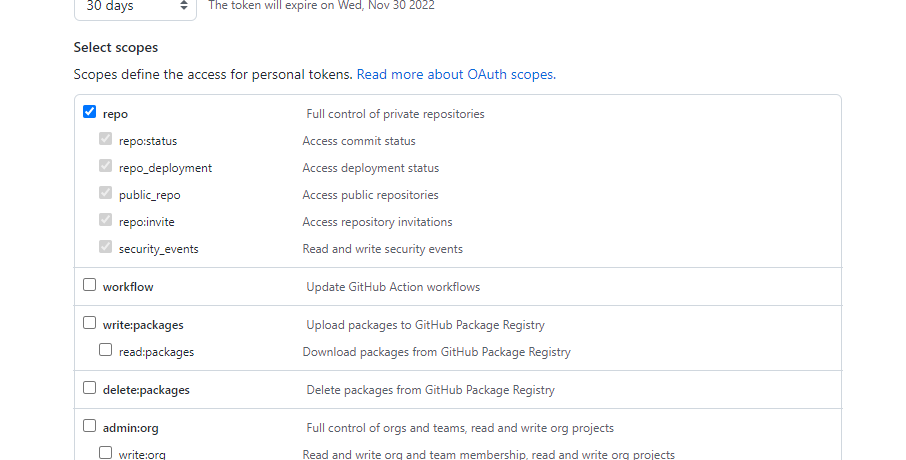
(6) generate new token으로 새로 만들고 권한은 repo권한을 체크한다.

(7) 토큰을 만들면 토큰 번호를 준다. 이 번호는 한번만 보여주므로 복사해서 딴데다가 적어놓는다.
토큰은 절대로 노출하면 안된다.
2. git api 활용(Octokit)
프론트, 백 둘다 코드를 실행해본 결과 둘다 잘 된다. 넣고 싶은곳에 넣으면 될것같다. 나는 백에다 넣었다.
(1) octokit/core 설치
npm i @octokit/core(2) 전체 코드
const express = require("express");
const router = express.Router();
const { Octokit } = require("@octokit/core");
require("dotenv").config();
router.post("/error", async (req, res) => {
  const { title, body, labels } = req.body;
  const octokit = new Octokit({ auth: process.env.GIT_TOKEN });

  await octokit
    .request(`POST /repos/TeTedo/react_project/issues`, {
      owner: "TeTedo",
      repo: "react_project",
      title: title,
      body: body,
      labels: labels,
    })
    .then(() => {
      res.send(true);
    })
    .catch(() => {
      res.send(false);
    });
});

module.exports = router;
front에서 제목, 내용 , 주제 를 받아온다.
labels 는 배열 형식으로 issue에서 label이 생성된다.
 .request(`POST /repos/git아이디/repository이름/issues`, {
      owner: "git아이디",
      repo: "repository이름",
      title: title,
      body: body,
      labels: labels,
    })
request부분에는 깃아이디와 레파지토리이름을 적어주면된다.
3. issue 예시

위 사진처럼 issue가 생성된다.
728x90
반응형
'개인프로젝트 > CHAM' 카테고리의 다른 글
| [CHAM] 후기 (0) | 2022.10.28 |
|---|---|
| [CHAM] 서버 배포 (0) | 2022.10.27 |
| [CHAM] redux state Reference (1) | 2022.10.21 |
| [CHAM] function 실행 오류 (0) | 2022.10.20 |
| [CHAM] redux에서 지속적인 로그인 체크 (0) | 2022.10.19 |